In this article, we'll briefly go over how to setup Azure OpenAI and integrate chat completions into your C# and .NET application.
Firstly, what are chat completions?
When interacting with ChatGPT or a similar LLM where you "chat" with it, you're using a type of chat completion system. A chat completion system allows the LLM to remember the context of your conversation with it so that it can respond accordingly. Chat completions use an API where for each chat response requested from the API, you must send the entire chat history with the request so the LLM can properly respond to it.
Click here to watch the full video on YouTube and subscribe!
All code samples are also available here on GitHub: https://github.com/AvironSoftware/dotnet-ai-examples/tree/main/AzureOpenAITest
How do Azure OpenAI and OpenAI relate?
OpenAI is an artificial intelligence company based in California. It's also colloquially used to refer to ChatGPT, which is created by OpenAI. Azure OpenAI is a deployment of OpenAI's technologies but done inside of Azure. Microsoft and OpenAI have a close working relationship, and as such, many of the LLMs and APIs available to OpenAI are available in Azure as well.
While many people will choose to use the OpenAI API directly, certain organizations that have an existing billing relationship with Azure or have specific data residency requirements might choose to use Azure OpenAI, as none of the content you send to Azure OpenAI is sent to OpenAI's servers.
Because of these two major reasons, many of our clients choose to use Azure OpenAI.
Setting up Azure to deploy an OpenAI instance
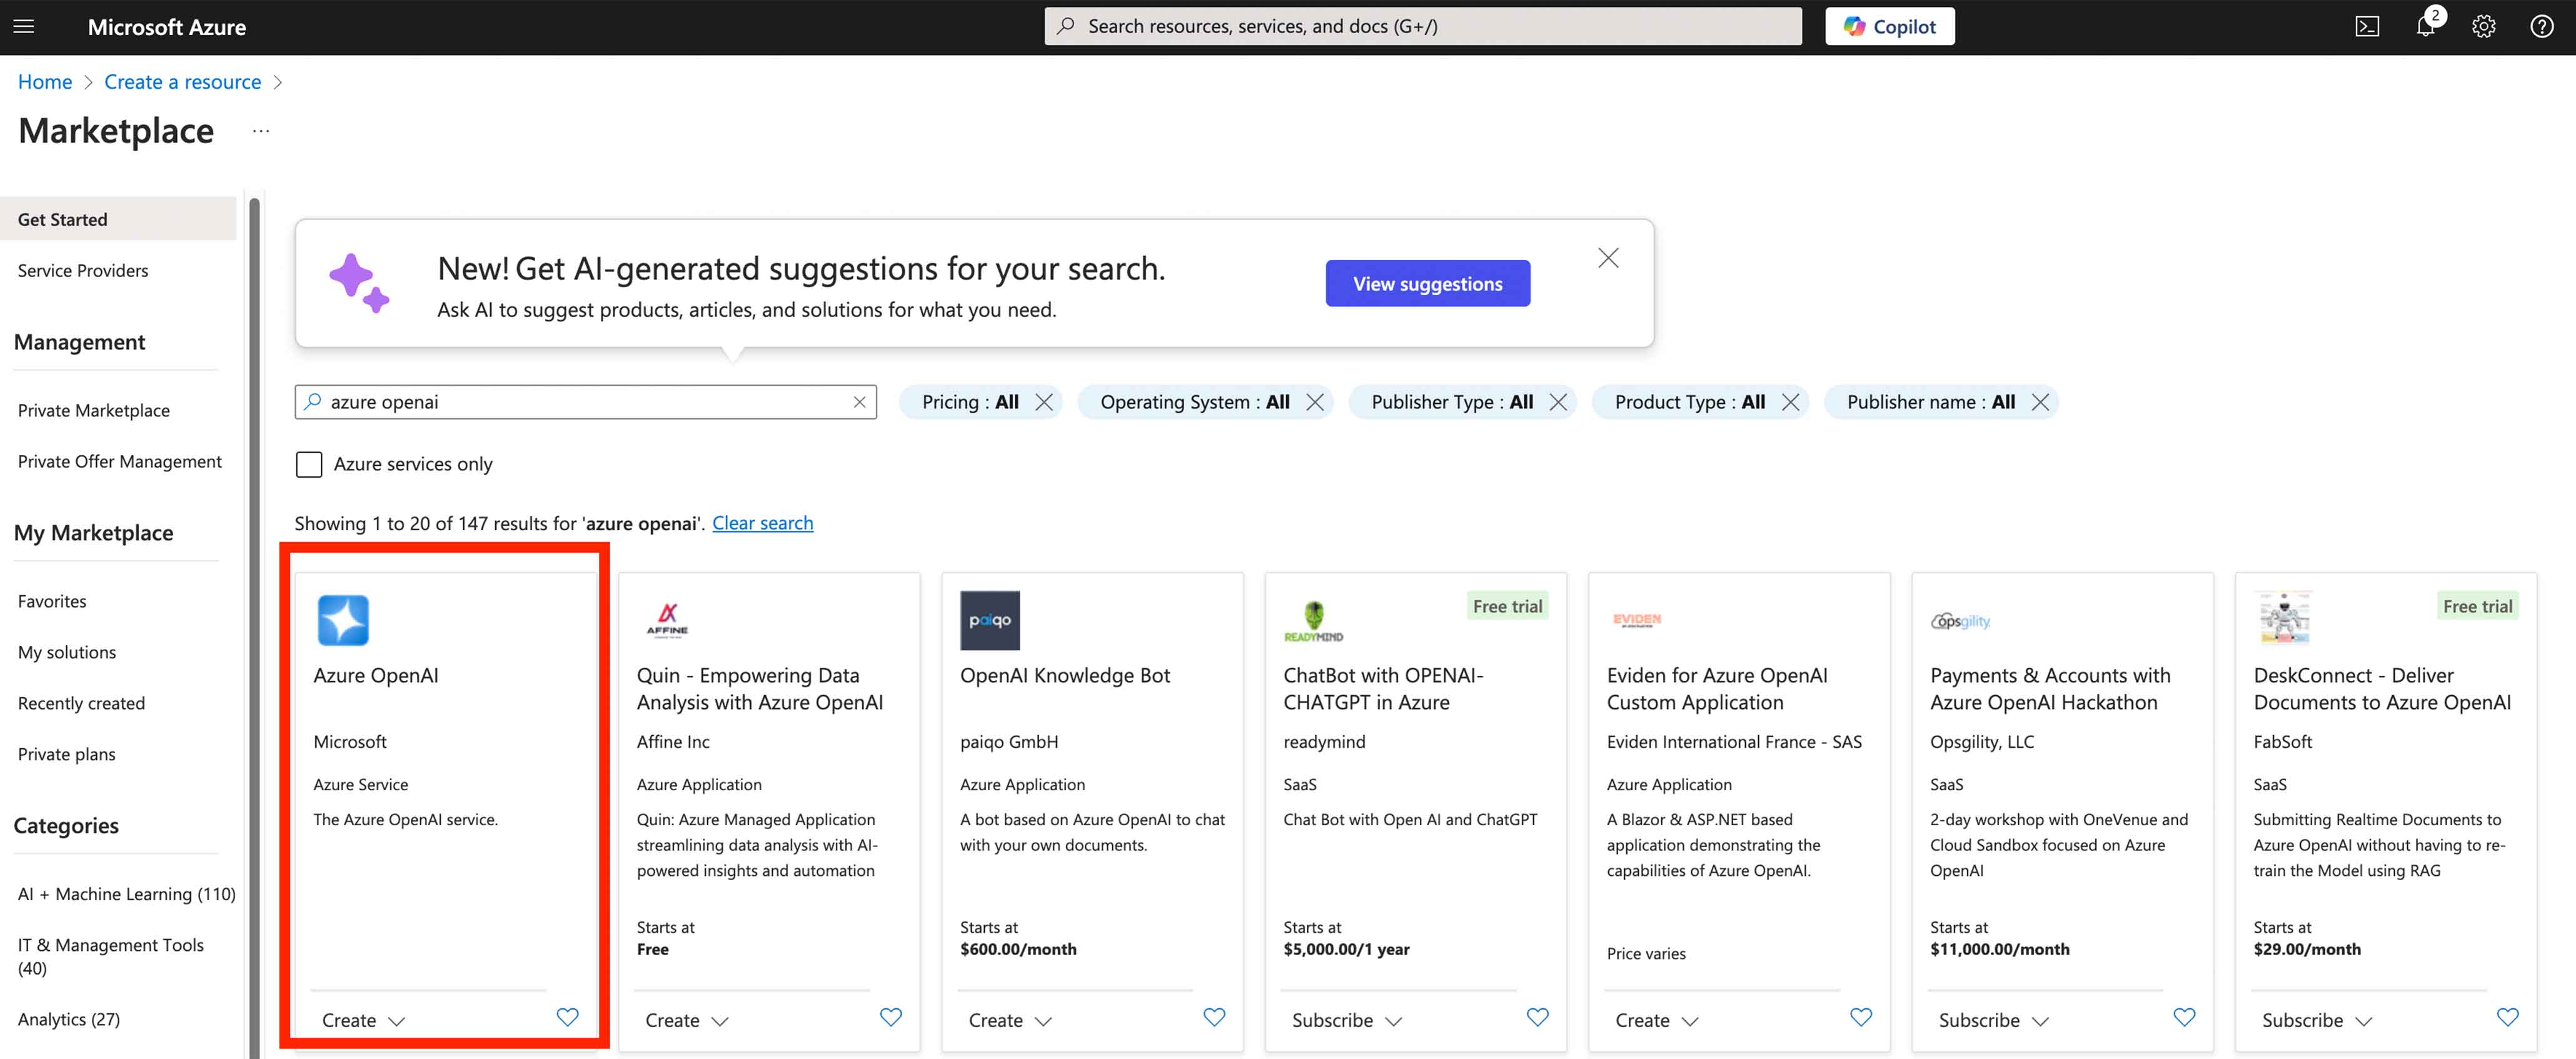
First, login to the Azure portal (https://portal.azure.com) and click Create Resource.

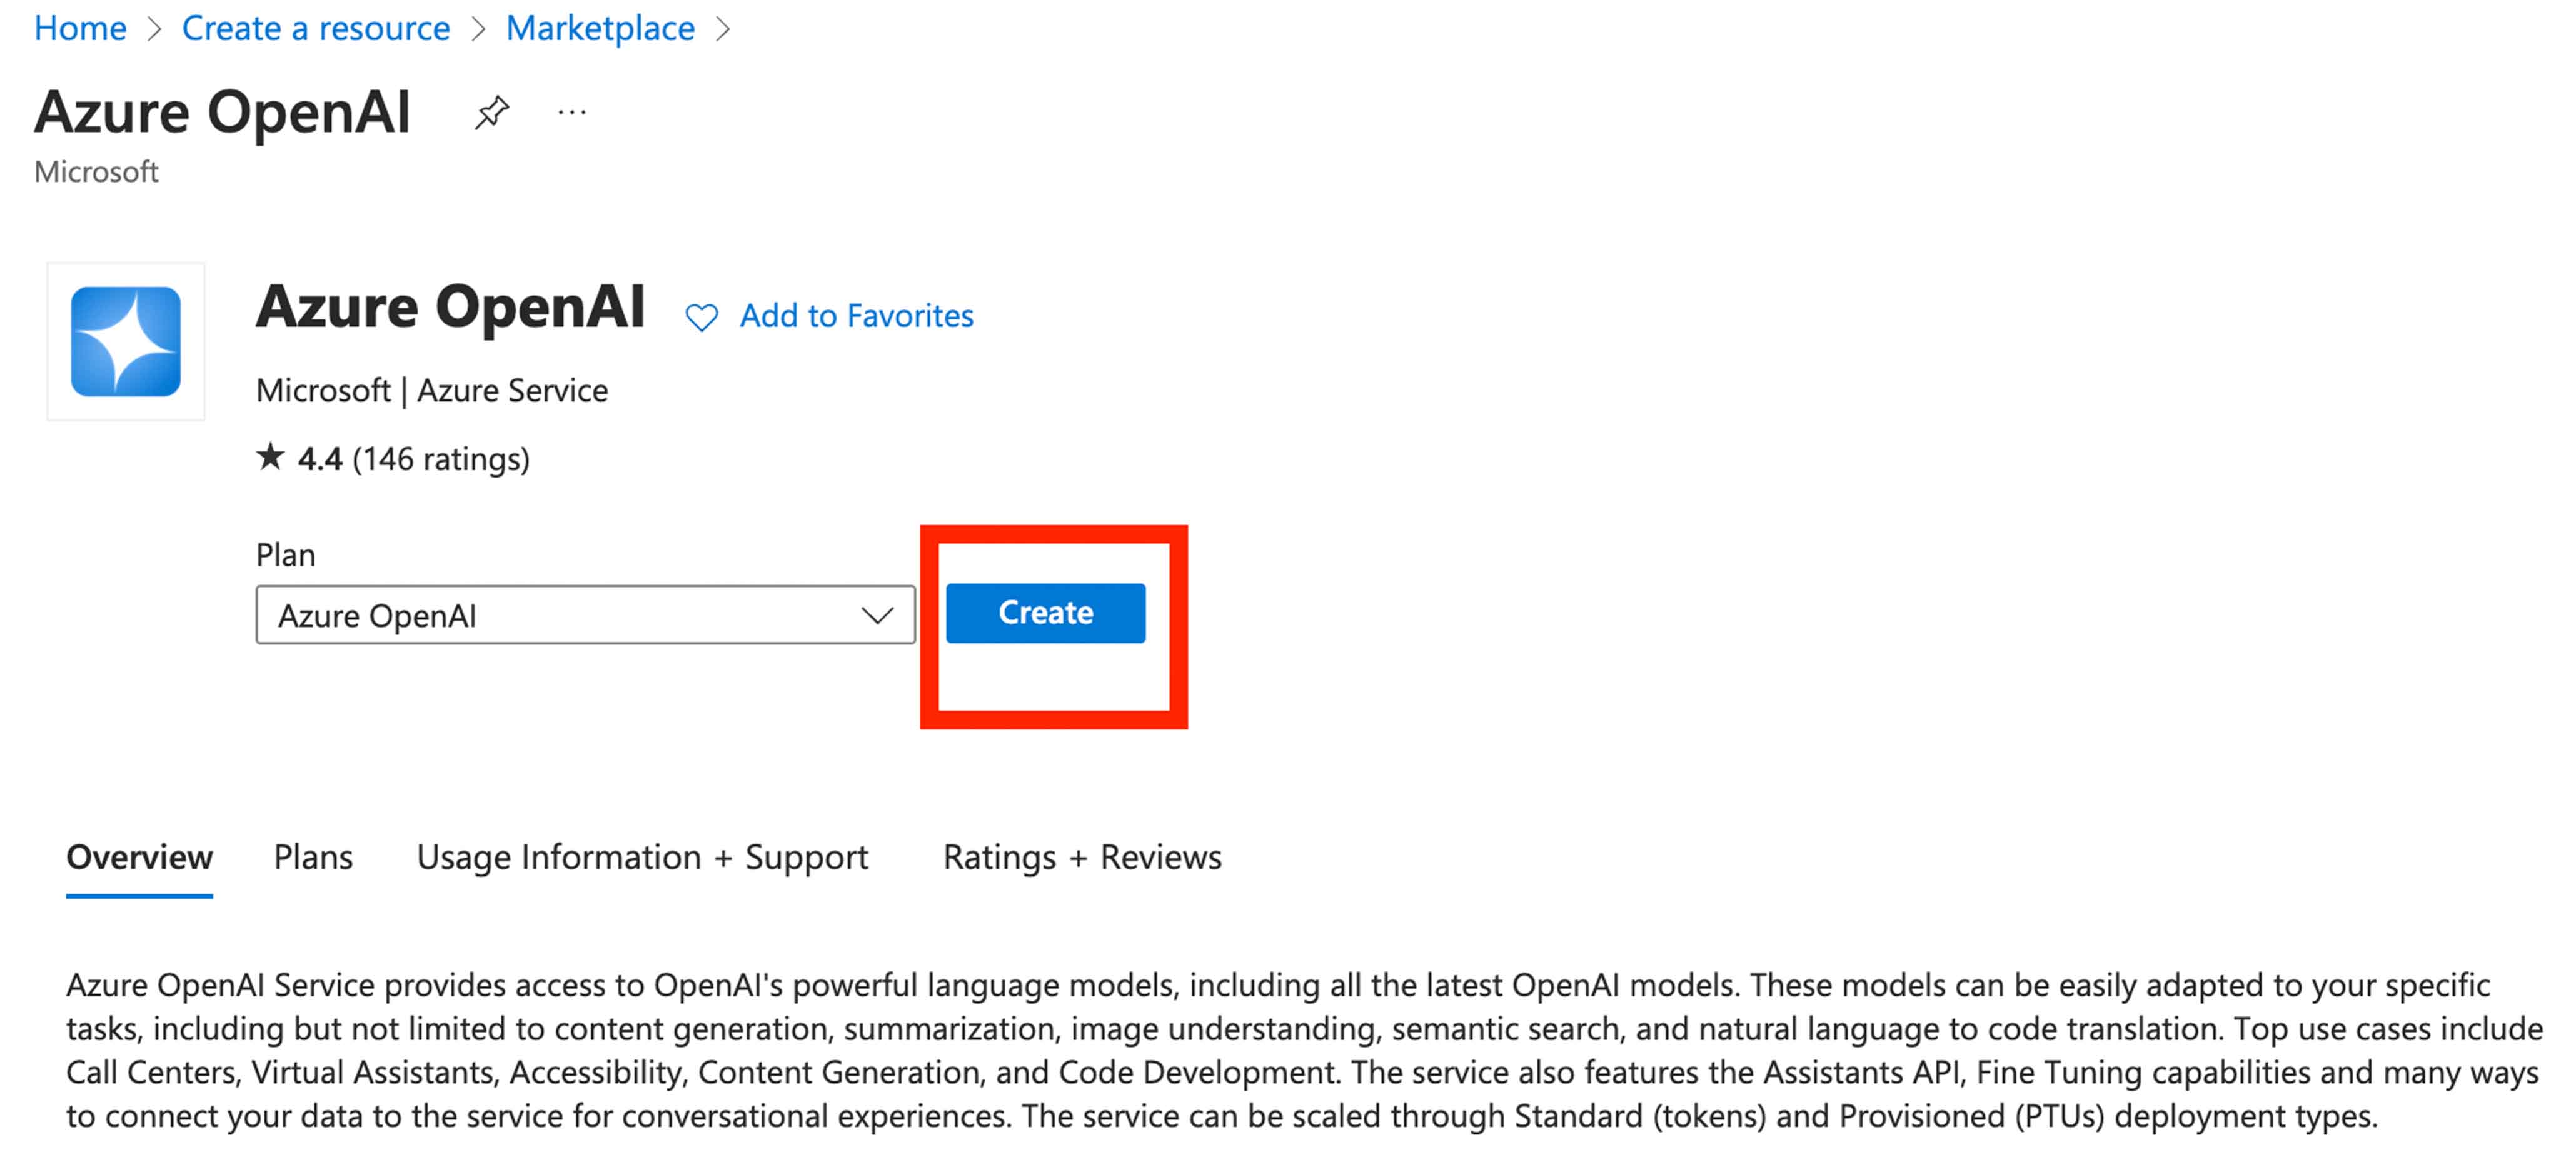
Then, search for and click on Azure OpenAI, then click Create.
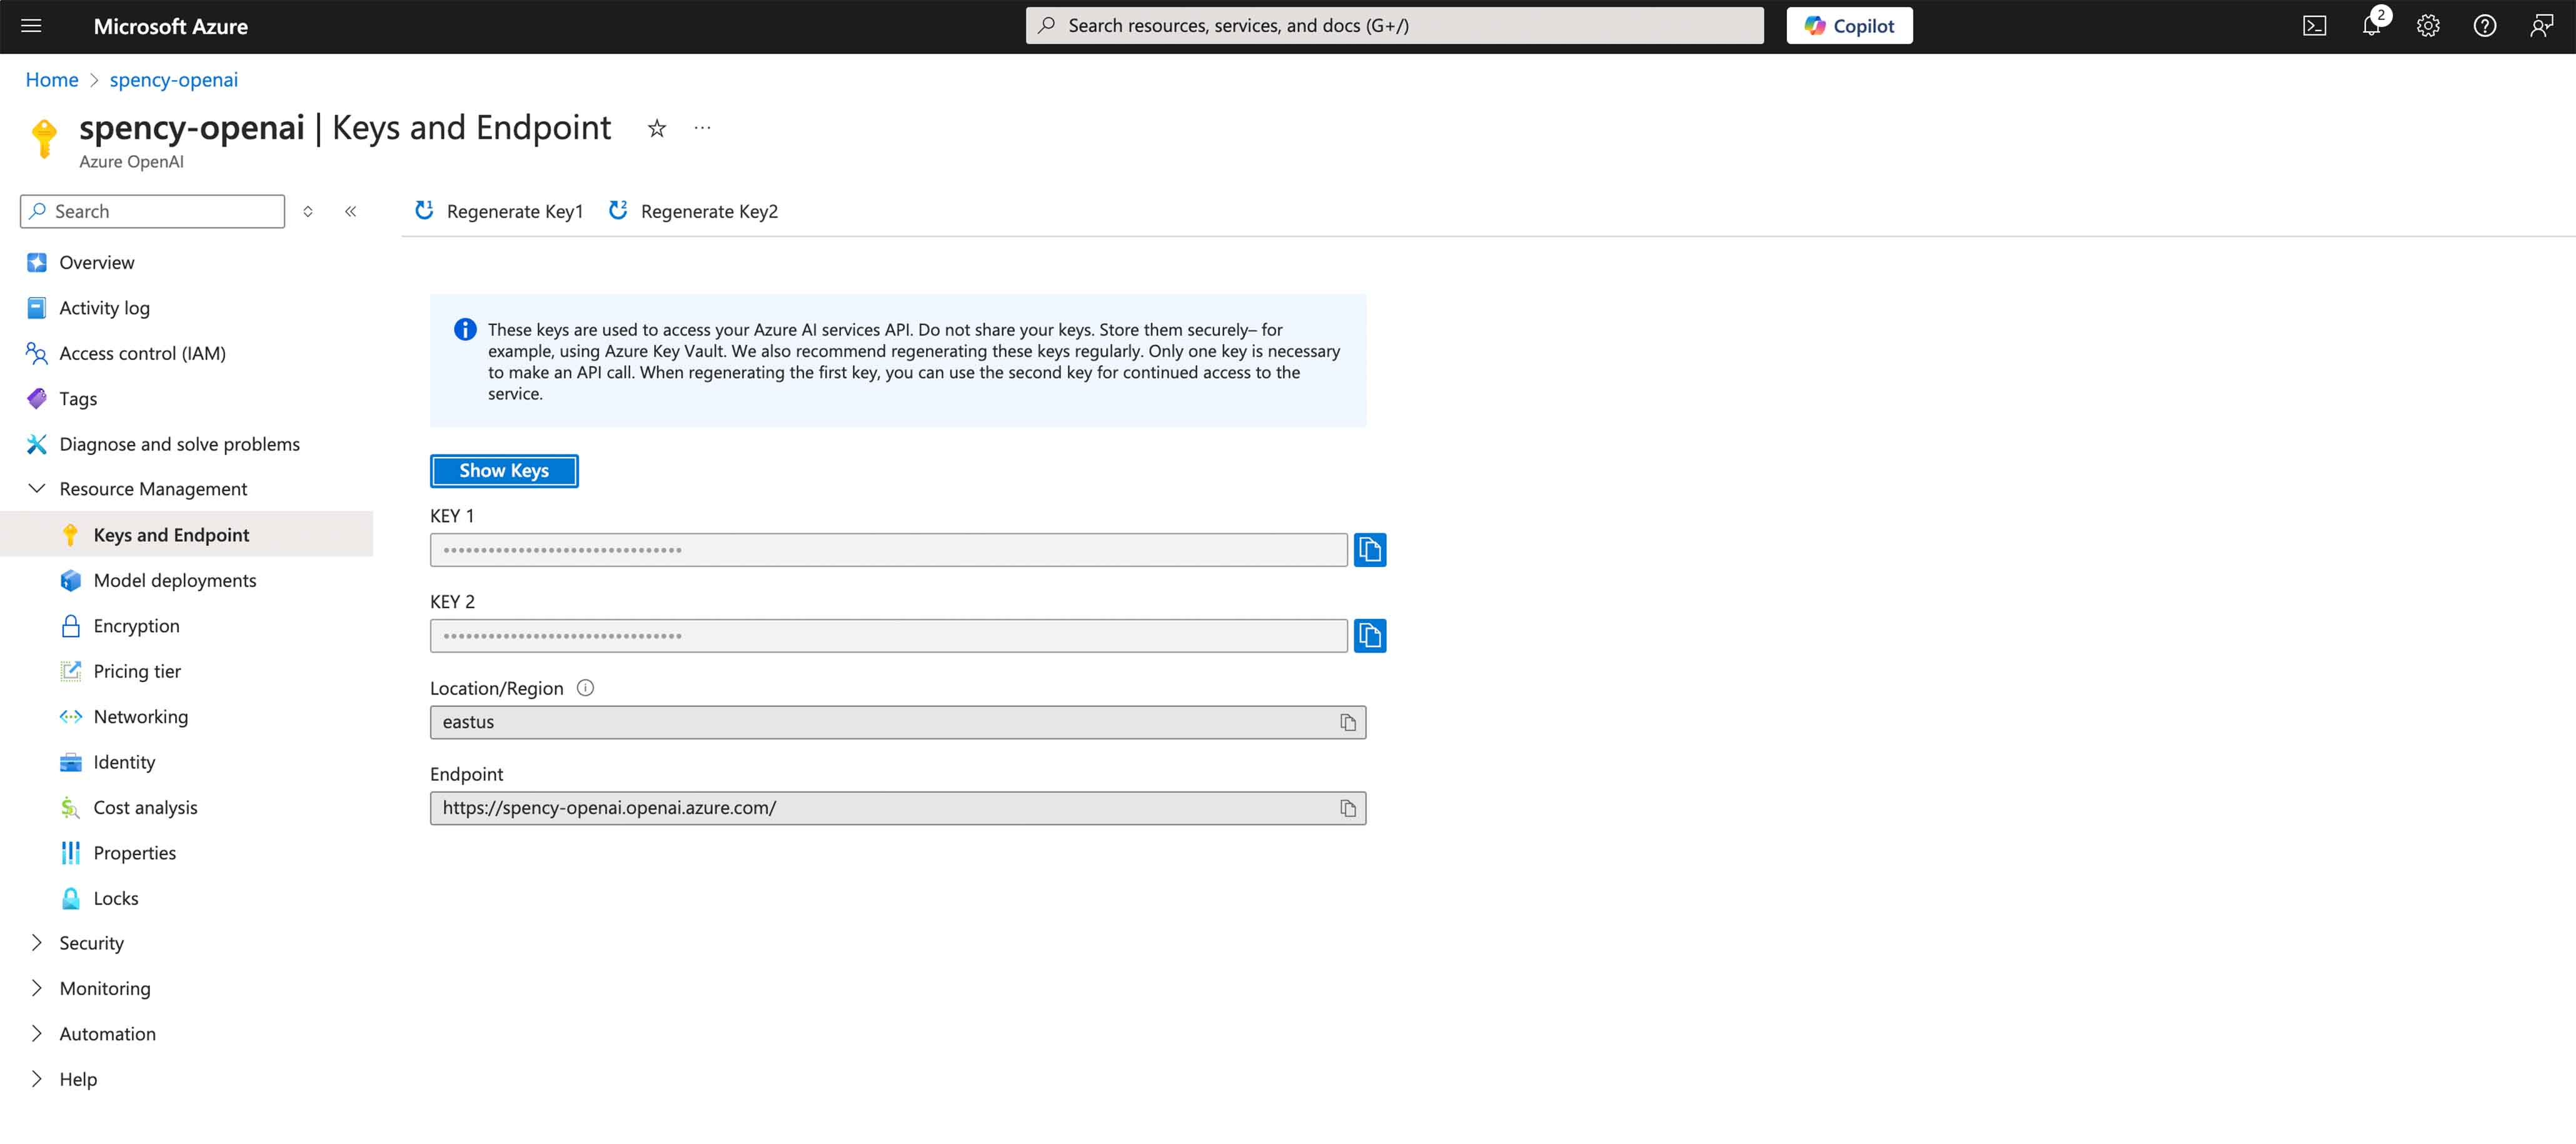
Go to the resource after it's deployed. Note down the endpoint and key:
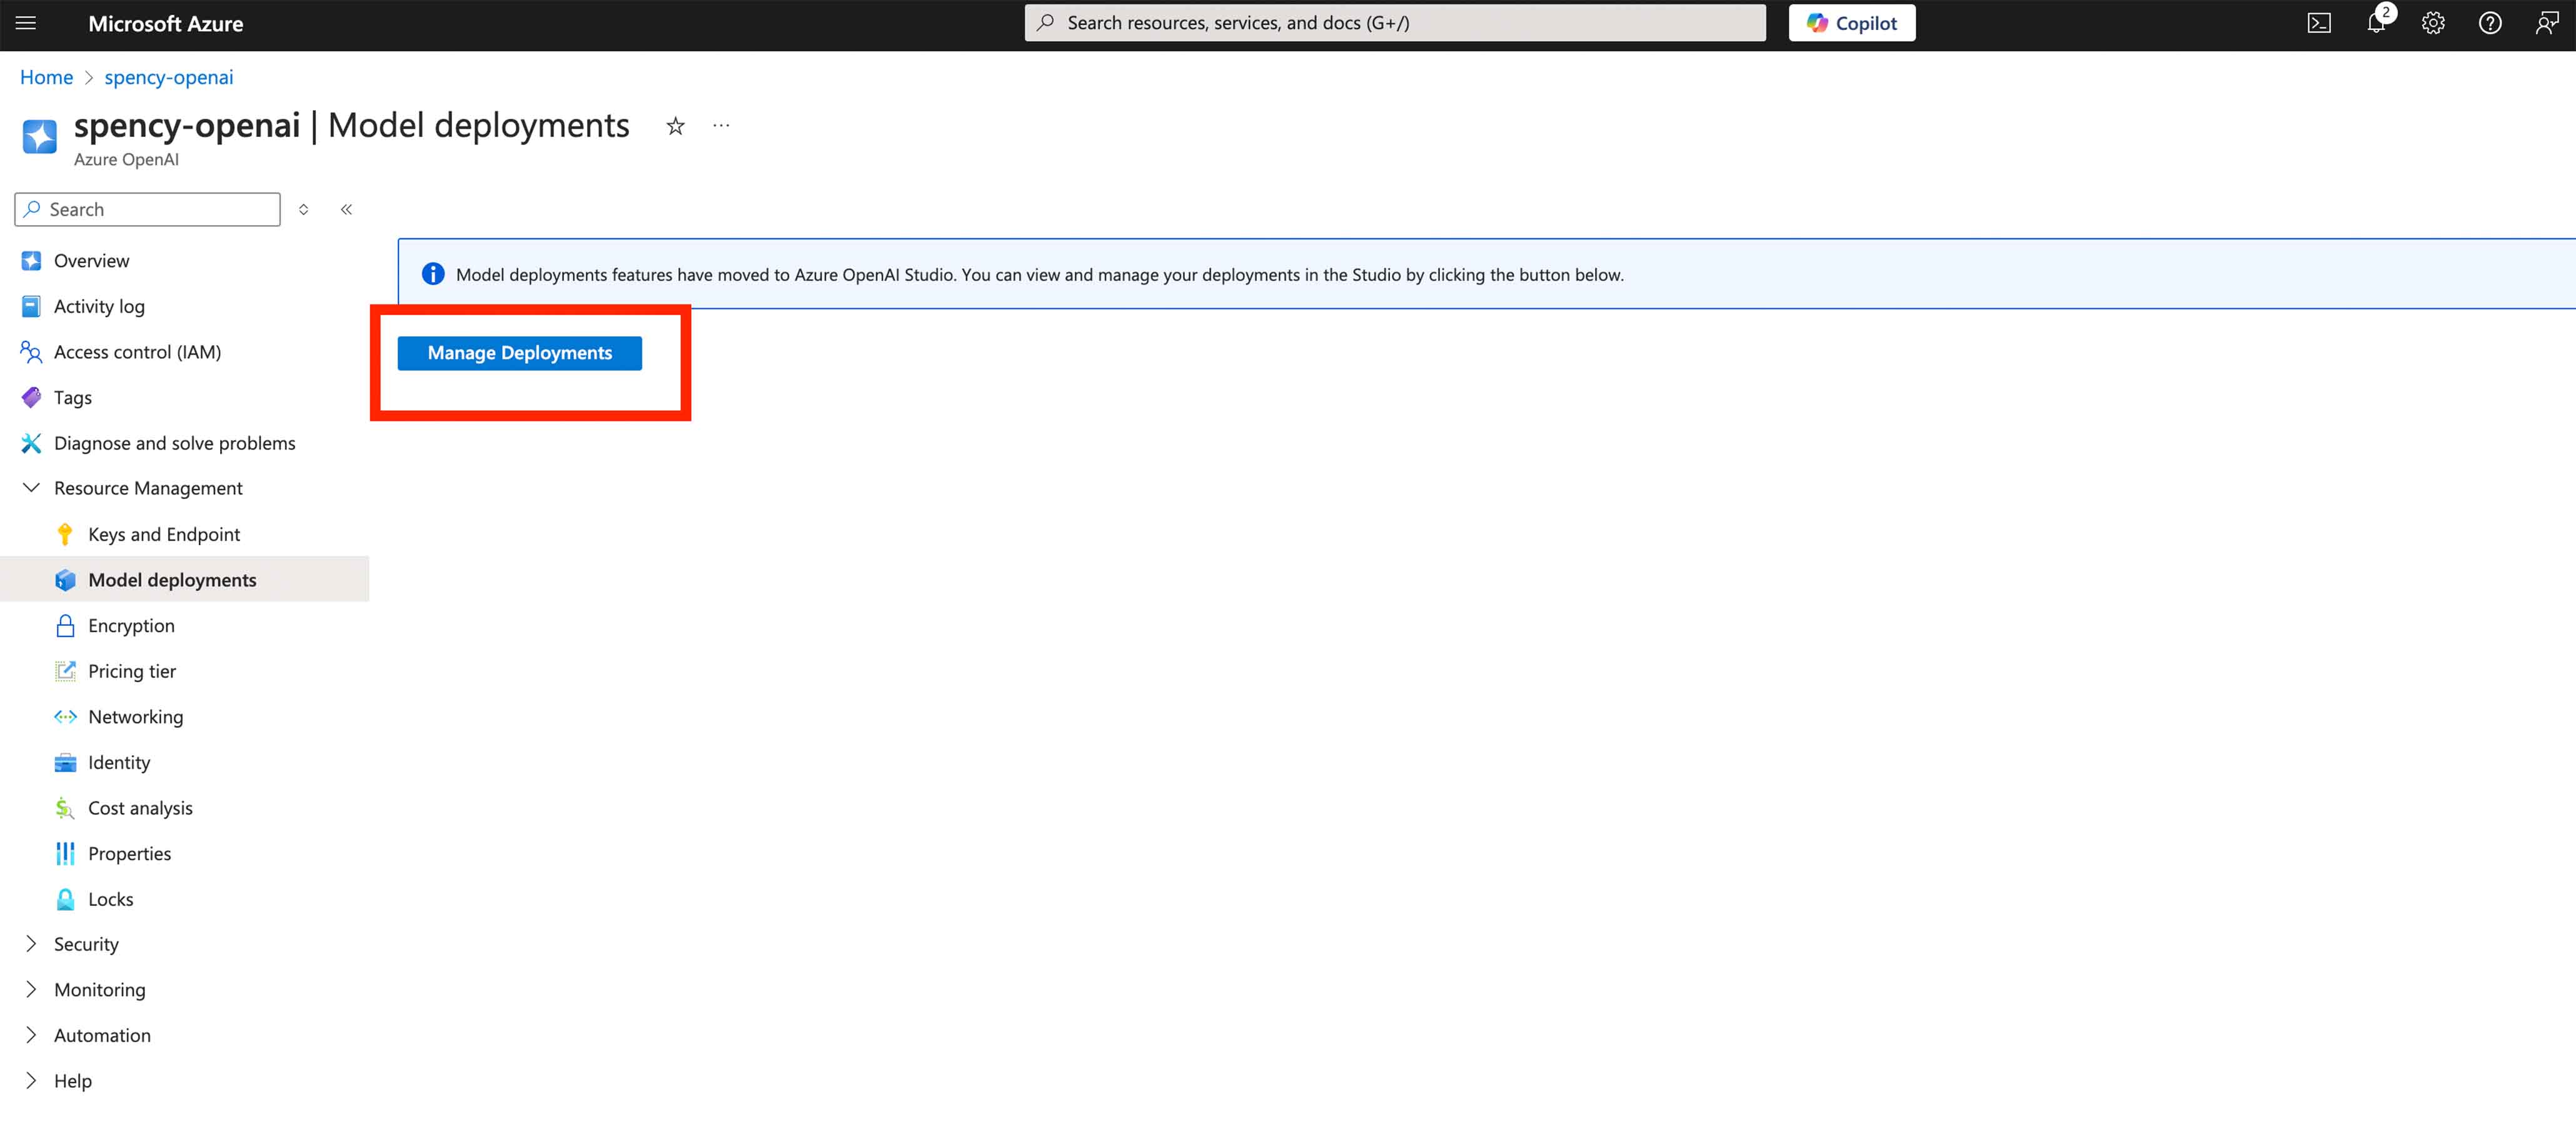
Then click on Model Deployments and click Manage Deployments:
You'll be redirected to the Azure AI Studio (you'll likely have to re-authenticate) and then presented with a deployment screen.
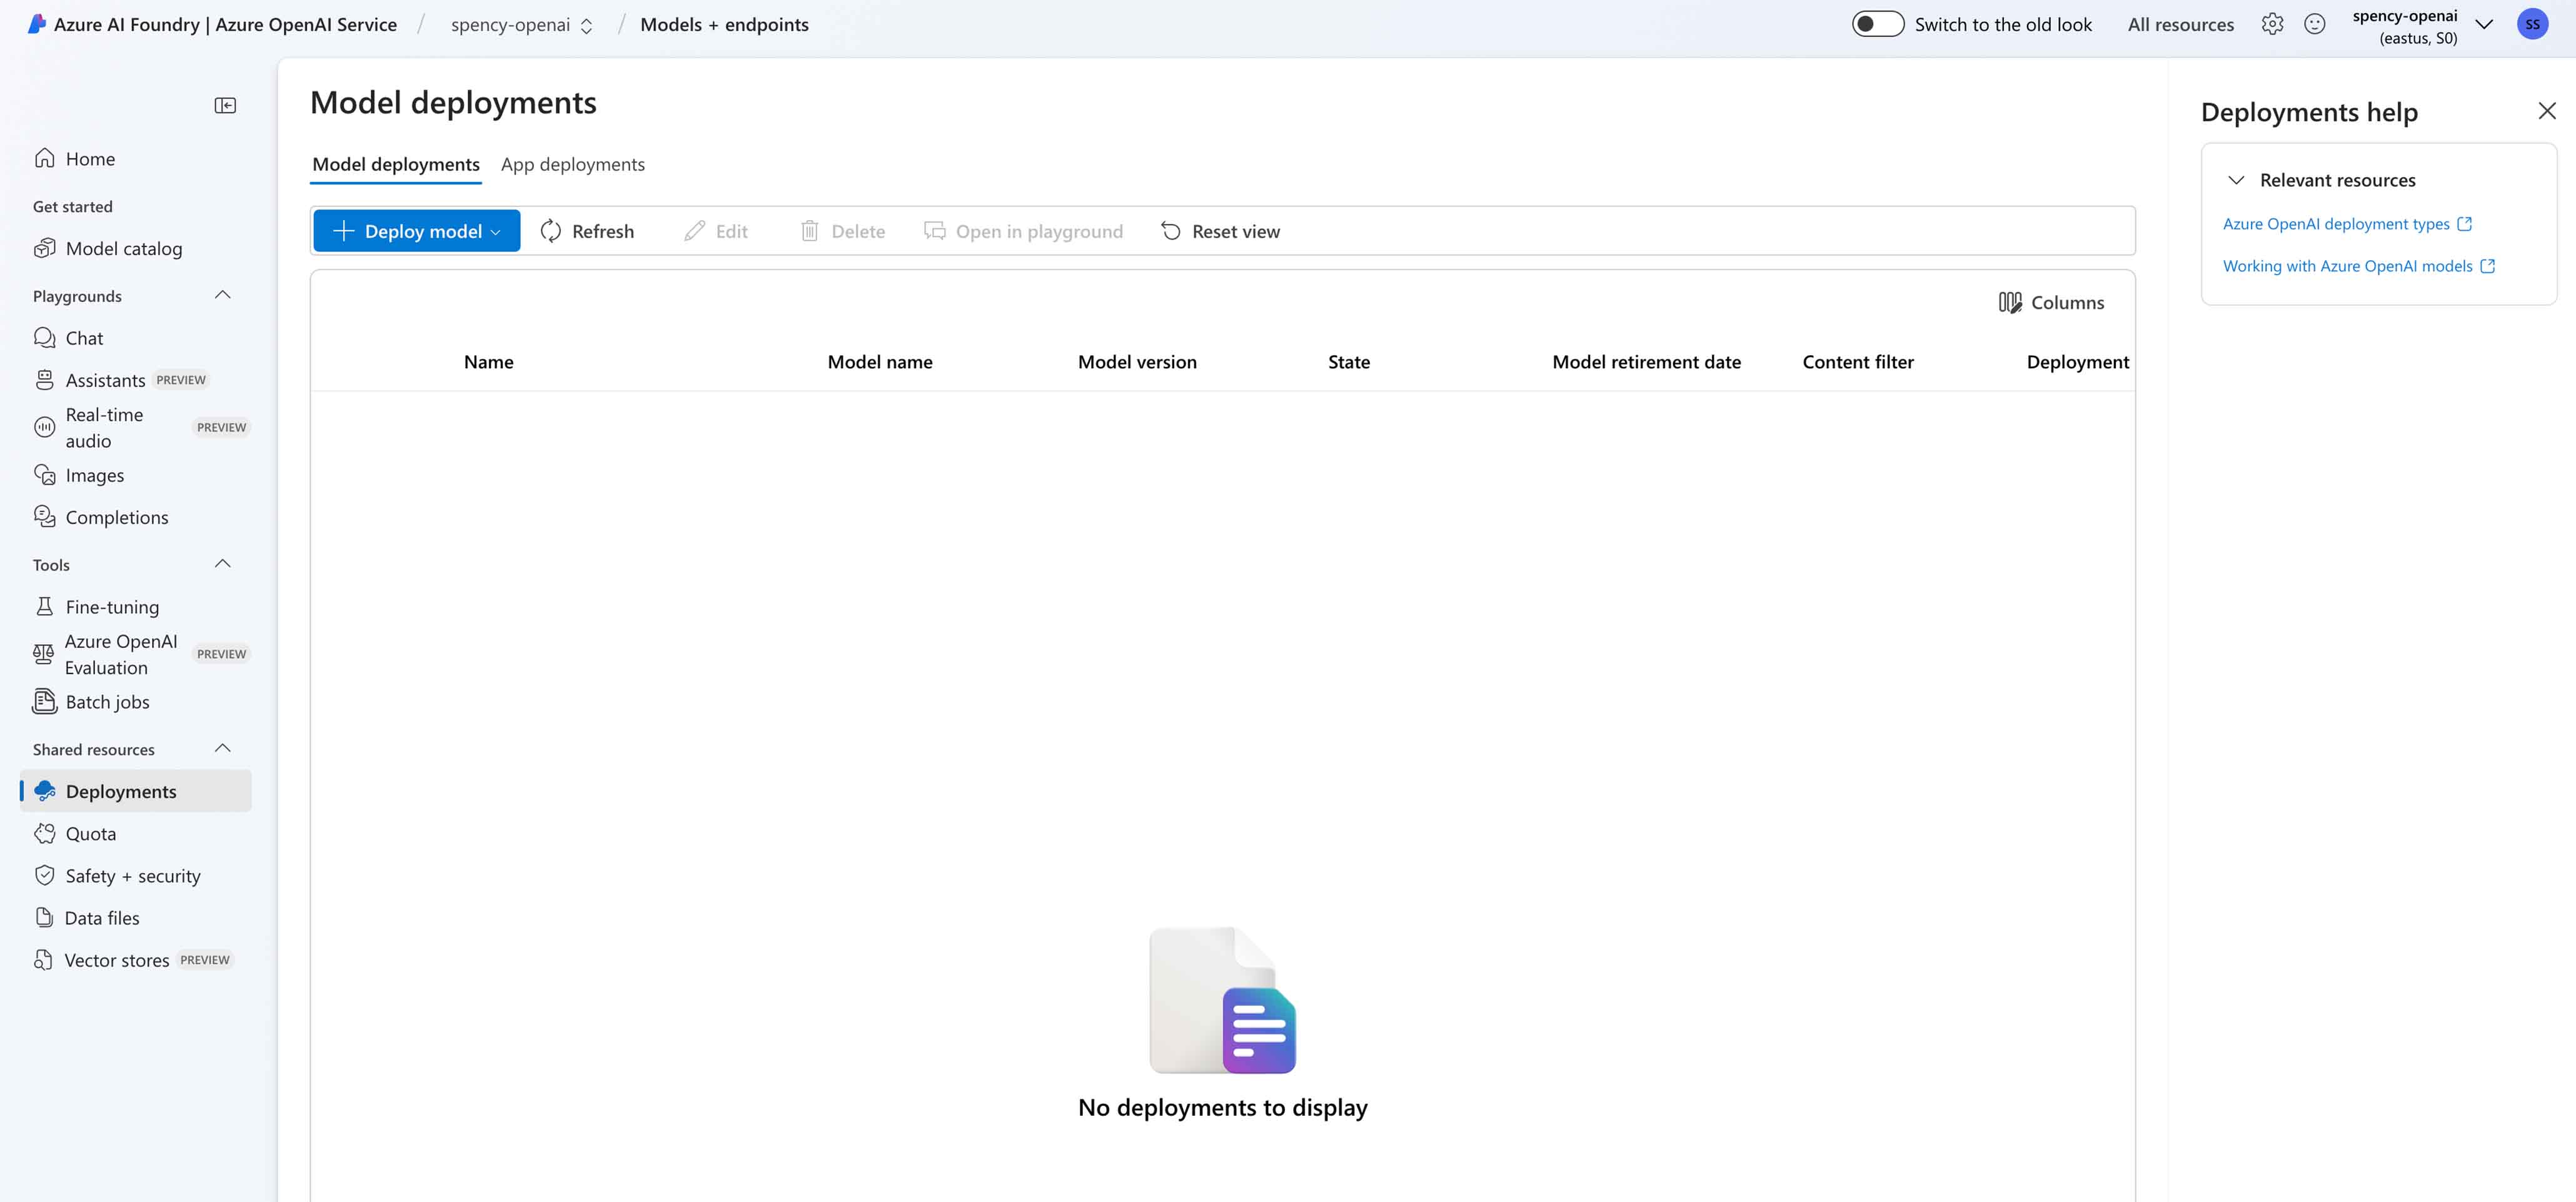
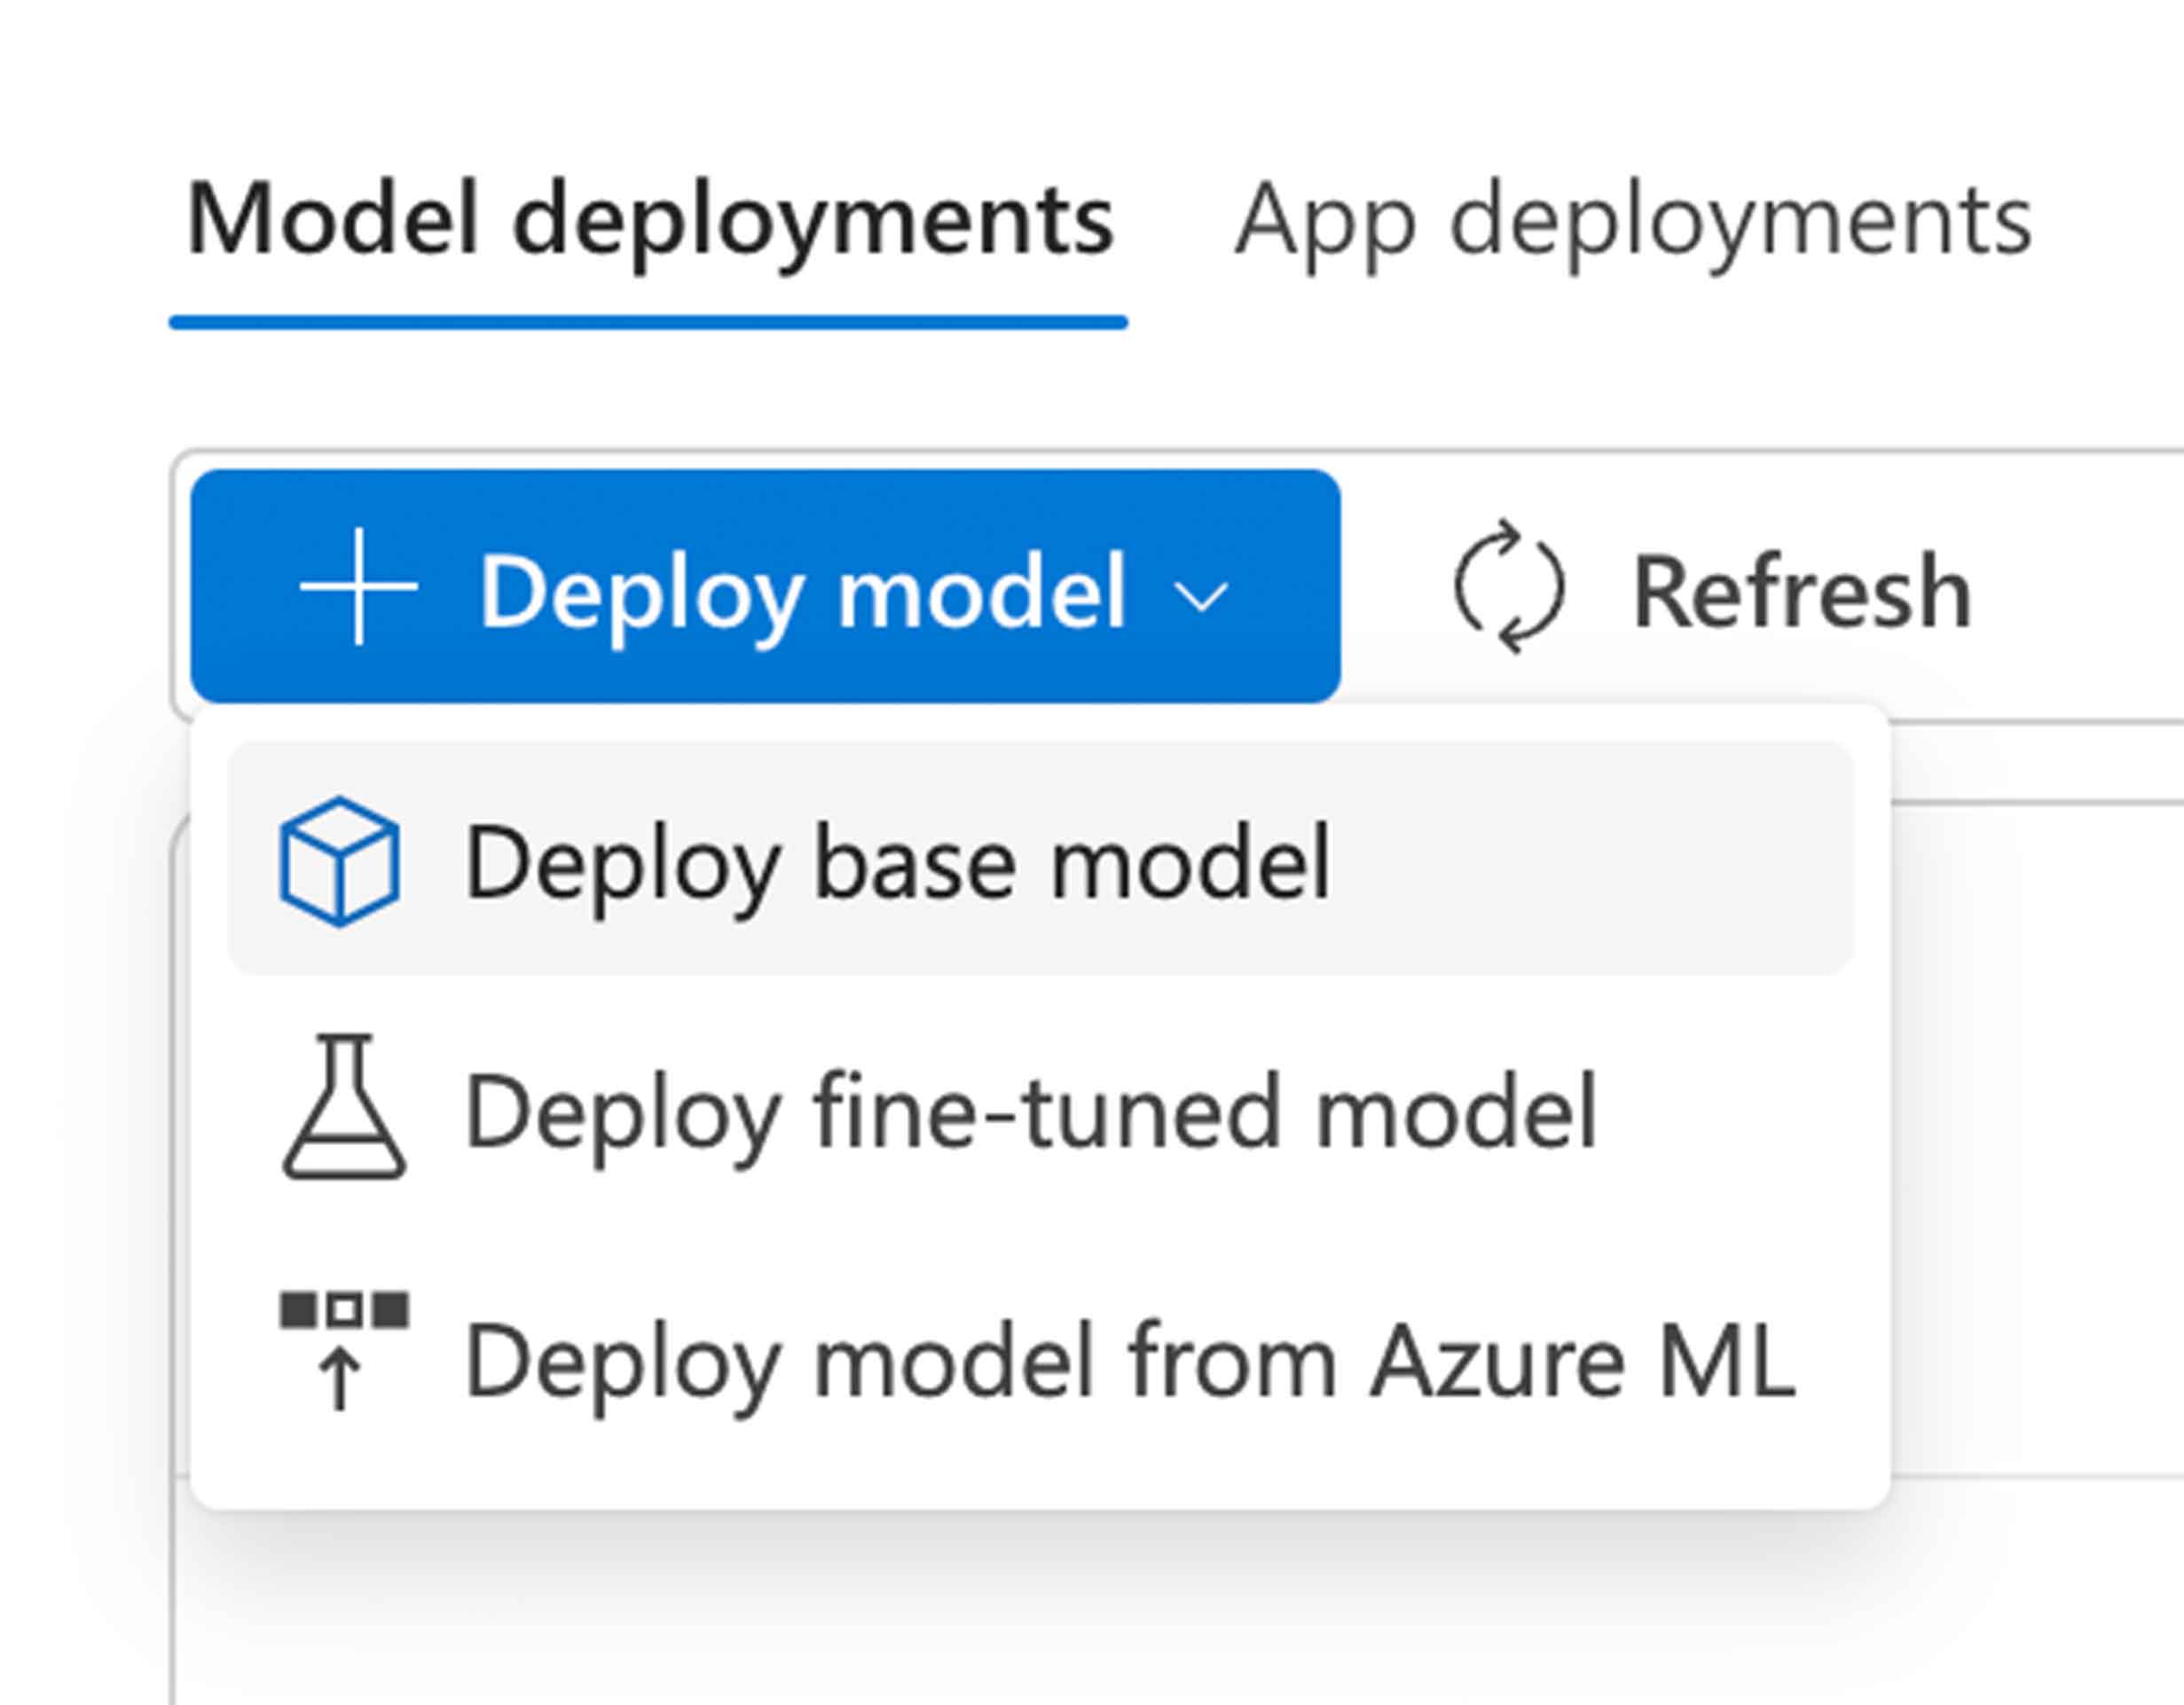
Click the Deploy Model button, and click Deploy Base Model.
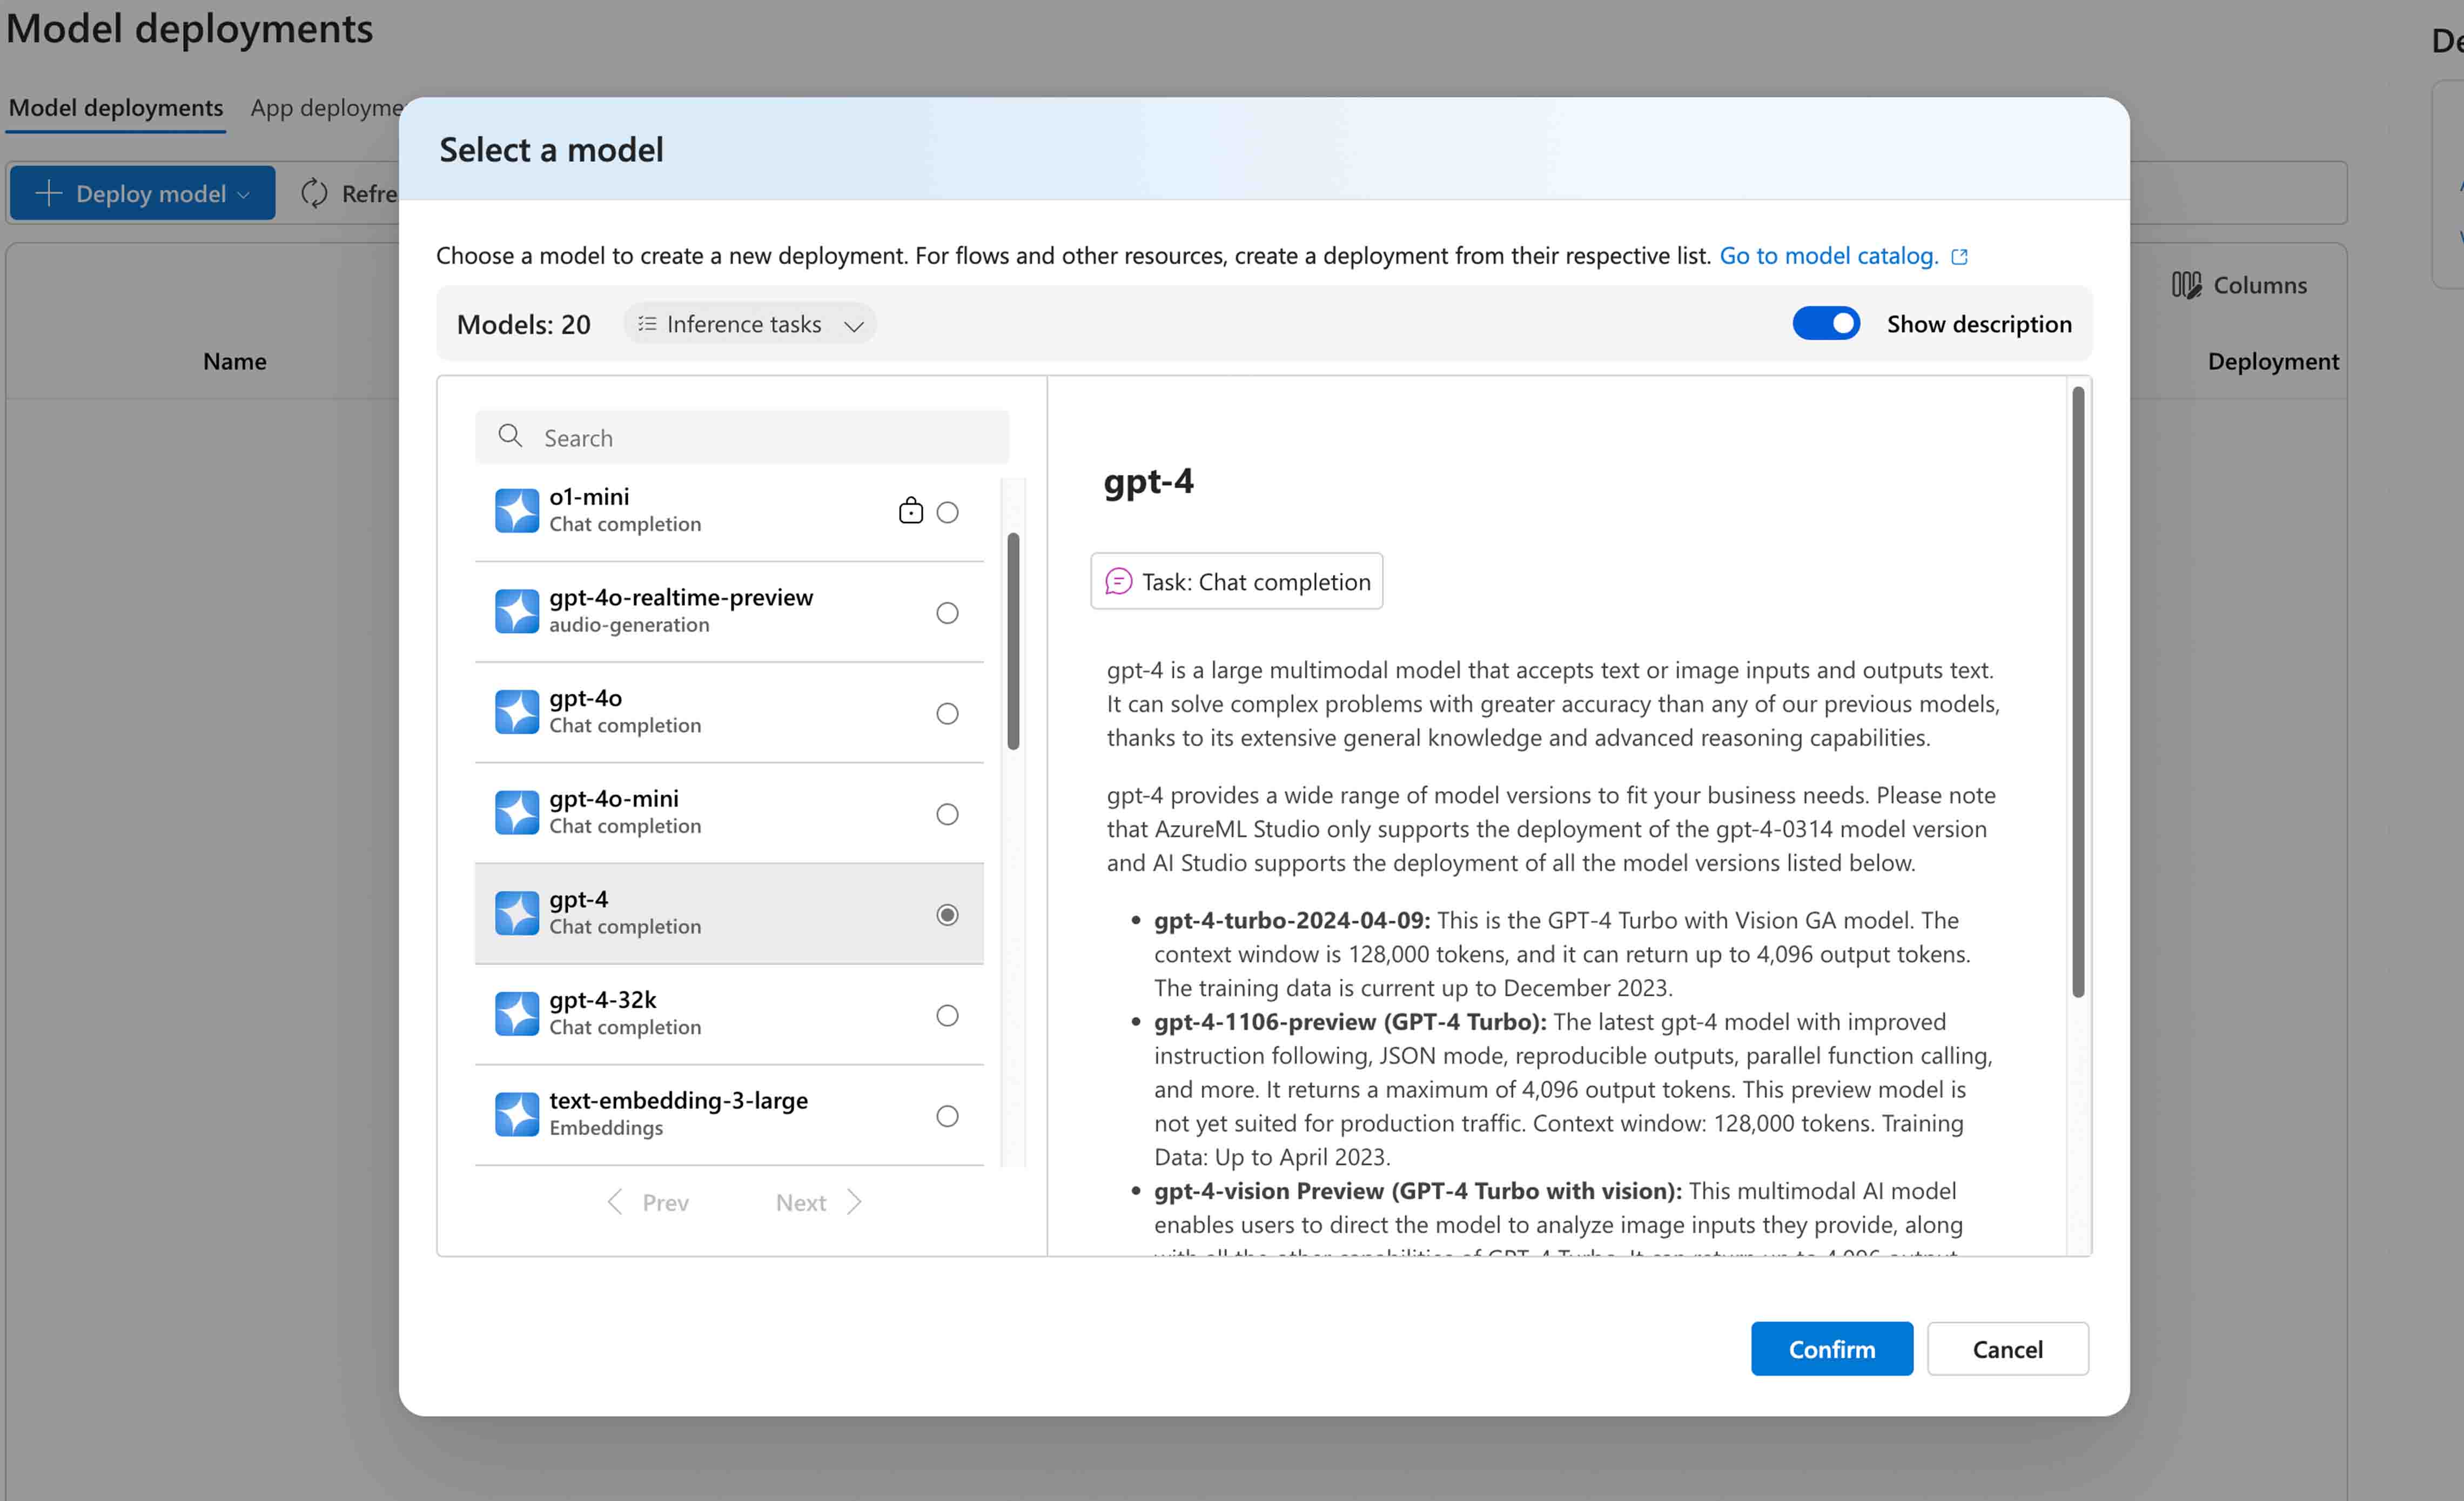
You'll be presented with a modal where you'll choose your AI model. (I recommend gpt-4o for general purpose stuff and gpt-4o-mini if you can get away with it since it's so much cheaper!)
Click Confirm and the next window will look like this. (NOTE, make sure to hit Customize and ensure the latest model is selected.)
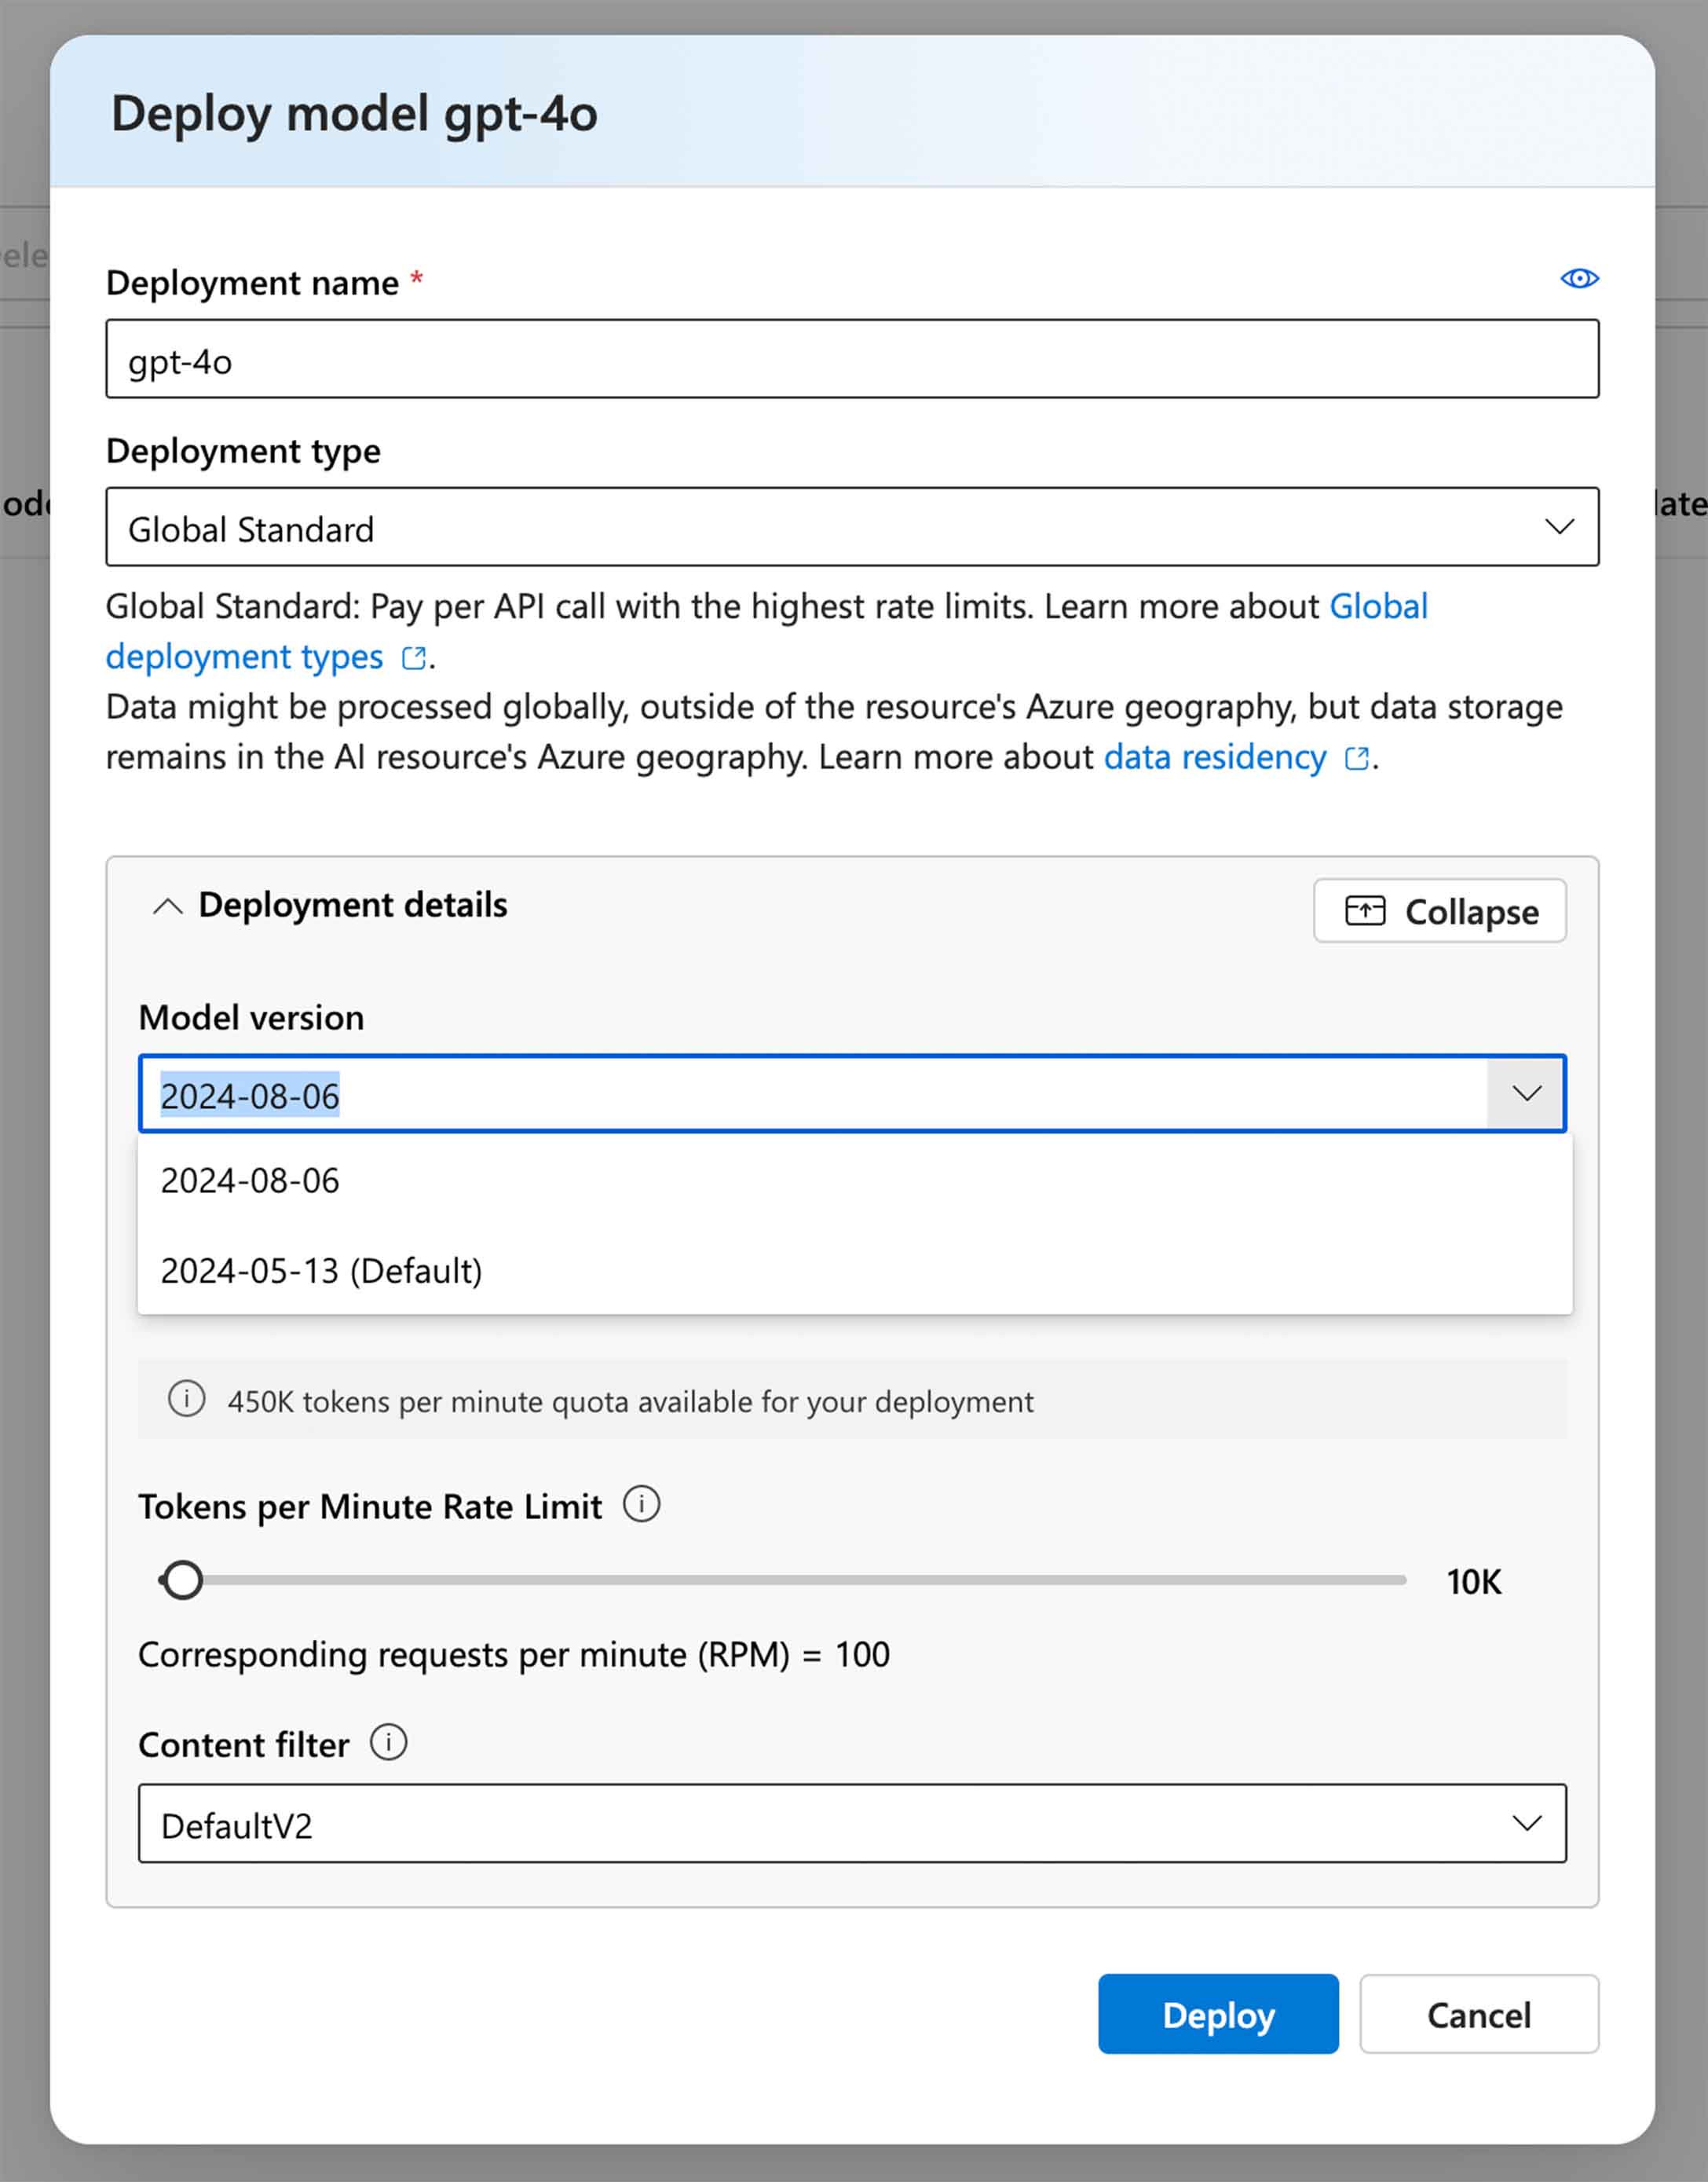
Adjust the tokens per minute rate limit as needed, then hit Deploy.
Connecting our C# app with Azure OpenAI
Start with a fresh C# console app. You can create one using your IDE or the `dotnet` CLI:
dotnet new console
Firstly, install this NuGet package using your IDE or the dotnet CLI:
dotnet add package Azure.AI.OpenAI
Import the proper classes like so:
using System.ClientModel;
using Azure.AI.OpenAI;
using OpenAI.Chat;
Then you can declare the variables that will be used to authenticate you to the Azure OpenAI API.
var deploymentName = "aviron-test-gpt-4o";
var endpointUrl = "https://avironopenaitest.openai.azure.com/";
var key = "5OmoakAVu54R7jTY...";
You can then declare your API clients like so:
var client = new AzureOpenAIClient( new Uri(endpointUrl), new ApiKeyCredential(key));
var chatClient = client.GetChatClient(deploymentName);
Afterwards, you'll declare the container for all of your chat messages:
var messages = new List<ChatMessage>();
Finally, we'll create the loop that we'll use to interact with the Azure OpenAI chat completions API.
We'll:
1. Read the line written by the user. (Exit the loop if the user writes "exit".)
2. Add it to the messages `List` declared above.
3. Send the entire message list to the API.
4. Read the response and print it to the console.
5. Add the messages to the messages list so it can be sent in subsequent requests.
while (true)
{
    Console.WriteLine("Say something to Azure OpenAI please!");
    var line = Console.ReadLine();

    if (line == "exit")
    {
        break;
    }

    messages.Add(new UserChatMessage(line));

    var response = await chatClient.CompleteChatAsync(messages);
    var chatResponse = response.Value.Content.Last().Text;

    Console.WriteLine(chatResponse);
    messages.Add(new AssistantChatMessage(chatResponse));
}
Finally, run the solution, and if everything is working correctly, you should be able to chat with your API!
You can alter this example to do things like add a system message to change the behavior of the chat. For example, you can ask it to respond to all requests in a Southern accent!
var messages = new List<ChatMessage>
{
    new SystemChatMessage("You have a Southern accent and are friendly!")
};
More Resources
Get The Code!
https://github.com/AvironSoftware/dotnet-ai-examples/tree/main/AzureOpenAITest
OpenAI Pricing
https://azure.microsoft.com/en-us/pricing/details/cognitive-services/openai-service/
Azure OpenAI Service Models
Chat Completions (Rest API Reference)
https://learn.microsoft.com/en-us/azure/ai-services/openai/reference#chat-completions
Watch the Full Video on the Aviron Software YouTube Channel
Unlock the latest tech tips and insider insights on .NET, React, ASP.NET, React Native, Azure, and beyond with Aviron Software—your go-to source for mastering the tools shaping the future of development!
Looking to integrate AI & LLM features into your applications?
Aviron Software is the Official Software Consultancy founded by Spencer Schneidenbach. Aviron Software can align with your in-house team, or consultancy, to produce, test & publish custom software solutions.


